
Residual solvents can persist in peptide materials from synthesis and purification, posing chemical safety and assay risks if left unchecked. Compliance rests on two frameworks: ICH Q3C for solvent classification and permitted daily exposure, and USP General Chapter <467> for testing procedures. Start by identifying every solvent used in the process, confirming supplier COAs list solvent data, and running targeted headspace GC or validated GC-MS where risk warrants it.
TL;DR:
- Use a risk-based approach to testing residual solvents, focusing on high-risk process stages like synthesis and purification.
- Confirm supplier COAs include specific solvent data and detection limits, and prioritize Class 3 solvents over more toxic classes when possible.
- Choose headspace GC for volatile solvents such as acetonitrile or ethanol, and GC-MS when identification certainty is needed due to complex matrices.
- Ensure sample preparation and calibration account for peptide matrix effects to avoid false low or high residual solvent readings.
- Regularly audit suppliers and employ a peptide database to align solvent control strategies with specific synthesis routes and reduce unnecessary testing.
Table of Contents
- Where Residual Solvents Enter Peptide Synthesis
- What Do ICH Q3C and USP <467> Require for Peptides?
- How Do You Choose Between Headspace GC and GC-MS?
- Preparing Peptide Samples for Solvent Testing
- Interpreting Results Against PDE and ppm Limits
- Reducing Solvent Risk Through Supplier and Process Controls
- What Quality Teams Get Wrong About Solvent Testing
- Where USAPeptide.info Fits Into Your Solvent Control Plan
- Where to Verify the Underlying Regulatory Requirements
- Sources
Where Residual Solvents Enter Peptide Synthesis
Most residual solvent contamination traces back to two process stages. Solid-phase synthesis and cleavage cocktails introduce the highest concentration of reagents, since resin swelling, coupling, and cleavage steps all depend on aggressive organic solvents. Preparative chromatography during purification adds a second layer of risk: mobile phases can carry over into the final lyophilized product if drying is incomplete.
The solvents that show up most often in peptide QC labs include:
- Acetonitrile (chromatography mobile phase, extremely common)
- Dimethylformamide, or DMF (resin swelling and coupling reactions)
- Dimethyl sulfoxide, or DMSO (solubilization and some cleavage steps)
- N-methylpyrrolidone, or NMP (coupling reagent solvent, high boiling point)
- Ethanol, methanol, and isopropanol (precipitation, washing steps)
- Ethyl acetate, acetone, formic acid, and ethers (extraction and cleavage)
Peptide matrices vary in how tightly they hold onto these compounds. A lyophilized cake with high surface area releases solvents differently than a dense, amorphous solid, which matters when you're deciding how aggressively to dry a batch before testing.
What Do ICH Q3C and USP <467> Require for Peptides?
ICH Q3C sorts solvents into three classes, and the distinction drives every downstream testing decision. Class 1 solvents (benzene, carbon tetrachloride, and similar compounds) carry unacceptable toxicity and should be avoided entirely unless their use is strongly justified. Class 2 solvents, including acetonitrile, DMF, and NMP, carry a permitted daily exposure (PDE) limit because of known toxicity concerns. Class 3 solvents, such as ethanol and acetone, have low toxic potential and get the most lenient treatment under the FDA's Q3C guidance.
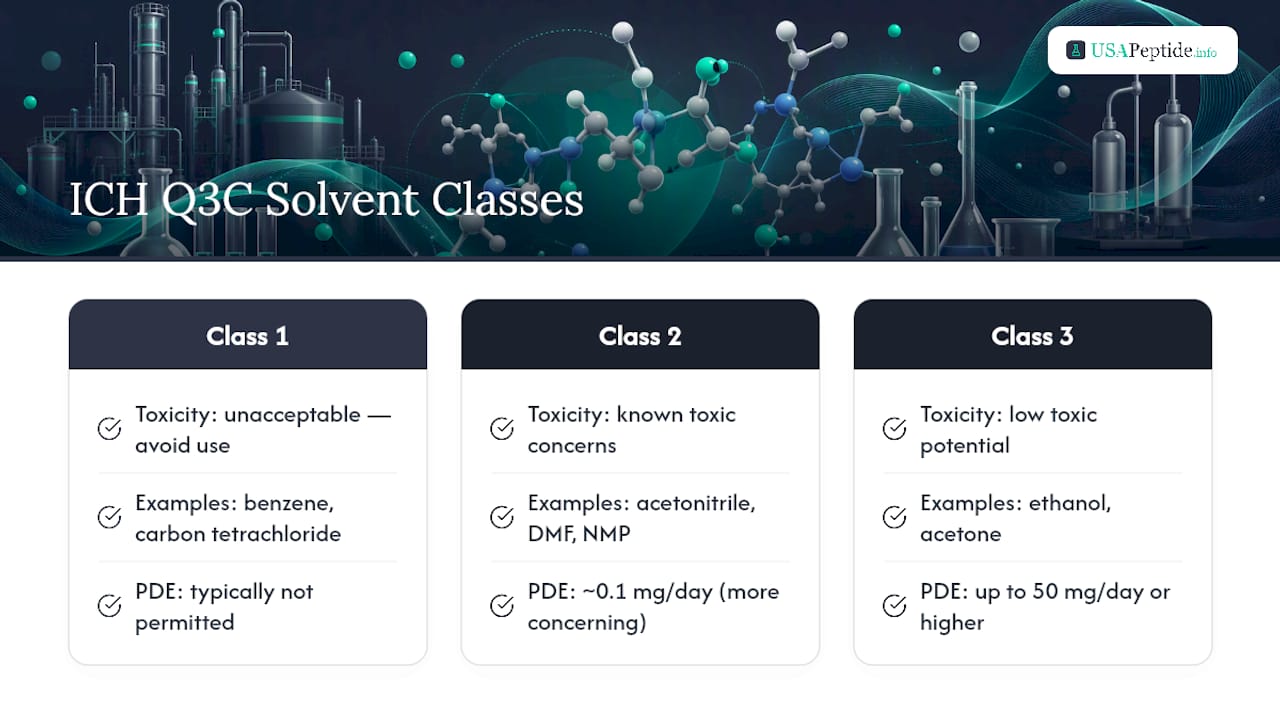
PDEs typically run from 0.1 mg/day for the more concerning Class 2 solvents up to 50 mg/day or higher for low-risk Class 3 solvents, and converting that number into a ppm limit requires an assumption about daily dose mass of the finished product. Labs generally have two compliance paths: calculate cumulative solvent exposure from ingredient-level data (Option 1), or test the finished product directly (Option 2). USP <467> requires testing whenever solvents are used in manufacturing unless a lab can demonstrate, through calculation, that residual levels sit convincingly below the limit. When that calculation isn't airtight, finished-product testing becomes mandatory, not optional.
How Do You Choose Between Headspace GC and GC-MS?
The right method depends on the solvent's volatility and how confident you need to be about identity versus just quantity. Static headspace gas chromatography (HS-GC) remains the workhorse for most volatile solvents because it avoids injecting the peptide matrix directly onto the column, which protects both the instrument and the separation.
- Static headspace GC: samples are sealed in vials, heated to equilibrate the vapor phase, then that vapor is injected. This works well for acetonitrile, methanol, ethanol, and other lower-boiling solvents.
- GC-MS: adds mass spectral confirmation on top of retention time, which matters when matrix interference or solvent coelution makes a flame ionization detector unreliable. Use it to confirm identity, not just presence.
- Direct injection or solvent-exchange methods: better suited to high-boiling solvents like DMF, DMSO, and NMP, which don't partition efficiently into headspace vapor at standard oven temperatures.
- Purge-and-trap or SPME (solid-phase microextraction): useful when you need to concentrate trace-level solvents before they hit the detector, particularly for low-level Class 1 contaminants.
Method sensitivity varies by solvent class and instrument configuration, but limits of detection in the low ppm range are typical for well-optimized headspace methods. System suitability testing, run before every batch of samples, should confirm the method can resolve target solvents from each other and from matrix peaks at the concentrations you're trying to catch. A method that passes system suitability on day one but drifts by day thirty isn't validated, it's lucky.
Preparing Peptide Samples for Solvent Testing
Sample prep decisions made before the vial ever reaches the GC often determine whether results are trustworthy.
- Select a diluent that matches the peptide's solubility profile. Water works for many hydrophilic peptides, but DMF or DMSO may be necessary for less soluble sequences, and the diluent choice affects how efficiently high-boiling solvents partition into the headspace.
- Fill headspace vials consistently and use an internal standard to correct for injection and equilibration variability between runs.
- Build calibration curves in a matrix that matches the sample matrix as closely as possible, not in pure solvent, since matrix effects can suppress or enhance detector response.
- Confirm system suitability meets a defined signal-to-noise target before accepting any batch of results.
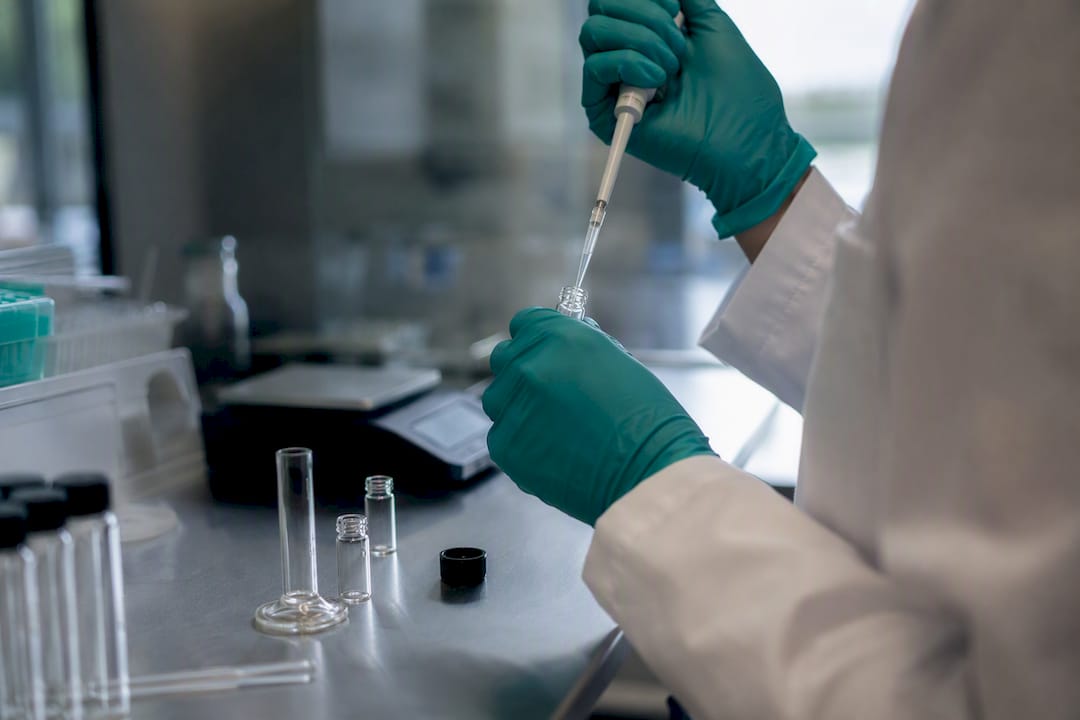
Validation has to demonstrate accuracy and recovery, precision, linearity across the expected concentration range, specificity from co-eluting matrix components, and robustness to small procedural changes. Some peptide matrices bind solvents through adsorption or strong solvation, which can suppress recovery and produce falsely low readings.
Pro Tip: If recovery in a spiked matrix comes in consistently low, don't assume the method is fine and the peptide is just "clean." Test whether the diluent itself is releasing the solvent efficiently before you trust that result.
Interpreting Results Against PDE and ppm Limits
Converting a PDE from mg/day into a ppm limit requires a stated assumption about the finished product's daily dose mass. This is where Option 1 (ingredient-based calculation) and Option 2 (finished-product testing) diverge, and the choice needs to be documented, not assumed.
When a result comes back above the acceptable limit, the response should follow a set order:
- Confirm the finding with an orthogonal method before treating it as real.
- Investigate the drying or lyophilization step, since incomplete drying is the most common root cause.
- Document a formal root-cause investigation and either justify the result scientifically or reject the batch.
- Never conflate a passing endotoxin result with solvent safety. Endotoxin assays like LAL detect bacterial pyrogens, an entirely separate quality attribute from chemical solvent residue, and one clean result says nothing about the other.
Release documentation should include raw chromatograms, calibration data, the validation summary, and a side-by-side comparison against the supplier's original COA. A dosage calculator helps standardize the product mass assumptions used in these ppm conversions across different peptide products.
Reducing Solvent Risk Through Supplier and Process Controls
The cheapest solvent control is the one you never have to test for. A rigorous COA review at incoming inspection should confirm the test method used, stated detection limits, an analyst signature, and evidence of ISO 17025 accreditation behind the numbers.
- Check that the COA's solvent test lists specific compounds and LOD/LOQ values, not just a blanket "meets USP <467>" statement.
- Accept cumulative ingredient-level calculations only when the underlying data and math are documented well enough to survive an audit.
- Favor Class 3 solvents over Class 2 or Class 1 wherever the synthesis route allows it.
- Validate drying and lyophilization parameters rather than assuming a standard cycle clears every solvent equally.
- Audit suppliers periodically rather than relying on a single COA reviewed once at onboarding.
A COA grading tool that flags missing solvent data or insufficient detection limits turns this review from a manual judgment call into a repeatable checklist.
What Quality Teams Get Wrong About Solvent Testing
Labs tend to swing to one of two extremes: testing every lot for every solvent regardless of process history, or trusting a COA at face value without checking whether its detection limits are even adequate. Neither approach holds up well under audit or, more importantly, under real risk analysis.
The stronger practice combines rigorous COA verification with periodic, targeted HS-GC surveillance on the solvents your specific synthesis route actually uses. That's not a compromise. It's a risk-based allocation of a finite QC budget toward the failure modes that actually occur.
Use a peptide database alongside your COA checks to understand which synthesis routes and solvents apply to a given compound before you decide what to test for.
— USAPeptide Team
Where USAPeptide.info Fits Into Your Solvent Control Plan
Reviewing every incoming COA by hand, line by line, is exactly the kind of repetitive task that eats lab time without adding proportional safety value. USAPeptide's COA grading tool checks whether a supplier's certificate names a validated solvent test method, states real LOD/LOQ values, and carries evidence of ISO 17025 accreditation, flagging the certificates that fall short before a bad lot ever reaches your bench.

The platform's peptide reference database pairs that grading tool with molecular profiles and synthesis background for individual compounds, and the research glossary covers terms like PDE and LOD/LOQ for anyone who needs a quick definition mid-review. Together, these resources help you build a defensible, risk-based incoming-materials plan instead of testing every lot at the same intensity regardless of actual risk. Run a COA check on your next supplier shipment before you commit lab hours to finished-product testing you may not need.
Where to Verify the Underlying Regulatory Requirements
For solvent classification and PDE tables, consult the FDA's Q3C guidance document directly rather than a summary. For procedural detail on headspace GC parameters and system suitability, the USP/USPNF chapter text is the authoritative source. For quick answers on when testing is required versus optional, the USP's own FAQ page addresses common edge cases directly.
This article is general information, not a substitute for advice from a qualified doctor. Consult a qualified healthcare professional about your own circumstances before acting on anything here.
Sources
- Q3C(R8) Impurities: Residual Solvents — FDA
- FAQs: Residual Solvents | USP
- Residual solvents (USP/USPNF chapter guidance)